

the chuck box
by Joel Tremblay

ABSTRACT
The thesis investigates the way we live and travel overland in rural Canada. It explores the typology of the camp combined with the mobility of a trailer as a source for surveying temporary, outdoor dwelling, and the activities this mode of building supports. Recorded throughout the thesis is the design and construction of my own off-grid overland trailer named the Chuck Box. The work was completed using various tools and techniques which has been documented and presented on YouTube. The study focuses on outdoor activities with an emphasis on self-resiliency, connection to nature, and light-touch-down architectures as a means to be respectful in the Canadian wilderness. The Chuck Box aims to bridge the valuable experiences of roughing it in the back country with some of the modern-day comforts people have grown accustomed to even when living outdoors.
“Wherever I sat, there I might live, and the landscape radiated from me accordingly. What is a house but a sedes, a seat? — better if a country seat. I discovered many a site for a house not likely to be soon improved, which some might have thought too far from the village, but to my eyes the village was too far from it. Well, there I might live, I said; and there I did live, for an hour, a summer and a winter life; saw how I could let the years run off, buffet the winter through, and see the spring come in.”
A QUICK HISTORY OF MOBILE ARCHITECTURE…

1
On February 8th, 2021, I pulled my trailer out of the workshop for the last time.
When I started this project, I did not have a clear idea of what the end result would be. At first, I had difficulty explaining to people what and why I was doing what I was doing. I must admit that I was a little naïve about how much work and time this would realistically take. That being said, this is the first piece of architecture that I am proud to call my own. I have always craved hands-on building experience, and I felt compelled to undertake the physical construction of one of my ideas at a 1:1 scale for my final thesis project.
It took roughly five months to get the project to the state in which it currently sits. Although the project may appear complete, I do not think that I will ever truly consider it done.
I am currently using this trailer.

2
I grew up in a township called Hornepayne which is located a stone’s throw away from the Geographic Centre of Ontario. These coordinates (49°15’0”N - 84°29’59”W) are located in what is commonly referred to as the north the province. The town has a population of less than a thousand people and basic supporting infrastructure. This township is commonly labeled as a ghost town. It is far from the main highways, lacks population and prosperous industry. This requires people of the community to have a close relationship with one another and practice a self-reliant lifestyle. Recently, more people are gaining interest in outdoor recreational activities which has increased the traffic in the north. That being said, I have always been surrounded by family and friends who camp, hunt, fish, and spend a considerable amount of time in the great outdoors.
I also love to tinker. Since I was young, I had a desire to make things, take them apart and then put them back together, modify them or even transplant things from one to another. I wanted my thesis to express who I am and where I come from.
For this project, I will be the client, designer, and builder. The project and process itself is simply a means to an end. The goal is to gain a deeper understanding of history, culture, wildlife, scenery, self-sufficiency, and hopefully learn something, and teach someone along the way.

3
My passion for the outdoors is owed to my grandfather and his dedication to teaching me how to be a respectful outdoorsman. He taught me how to catch and clean fish, how to distinguish different species, when to release, to respect the fishing seasons, and what to look for in a lakebed when scouting new lakes to fish.
Fishing is exciting when the fish are biting and discouraging when they are not. There is a level of patience needed so that when a fish does bite, you do not miss setting the hook. Although the end goal is to catch fish, the established mindset is about enjoying the activity and being outdoors. I have learned the importance of having the correct equipment, plans, and redundancies when venturing out to remote settings. Rituals are developed such as waking up before the sun rises so that you can make it to lake at the break of dawn. There is nothing more refreshing than taking a deep breath of the crisp morning air while out on a mirror-like lake.
The individuals I find myself out with share a similar respect toward wildlife and conservation. These people are as much hunters, anglers, and campers as they are conservationists. These relationships are forged while being outdoors. We have a responsibility to take care of the earth – not only for ourselves, but for the wildlife that we share it with. The first step toward a better environment is by reinforcing our relationship with nature, not one that is romanticized but one that focuses on understanding and using it in a respectful and responsible way.
4
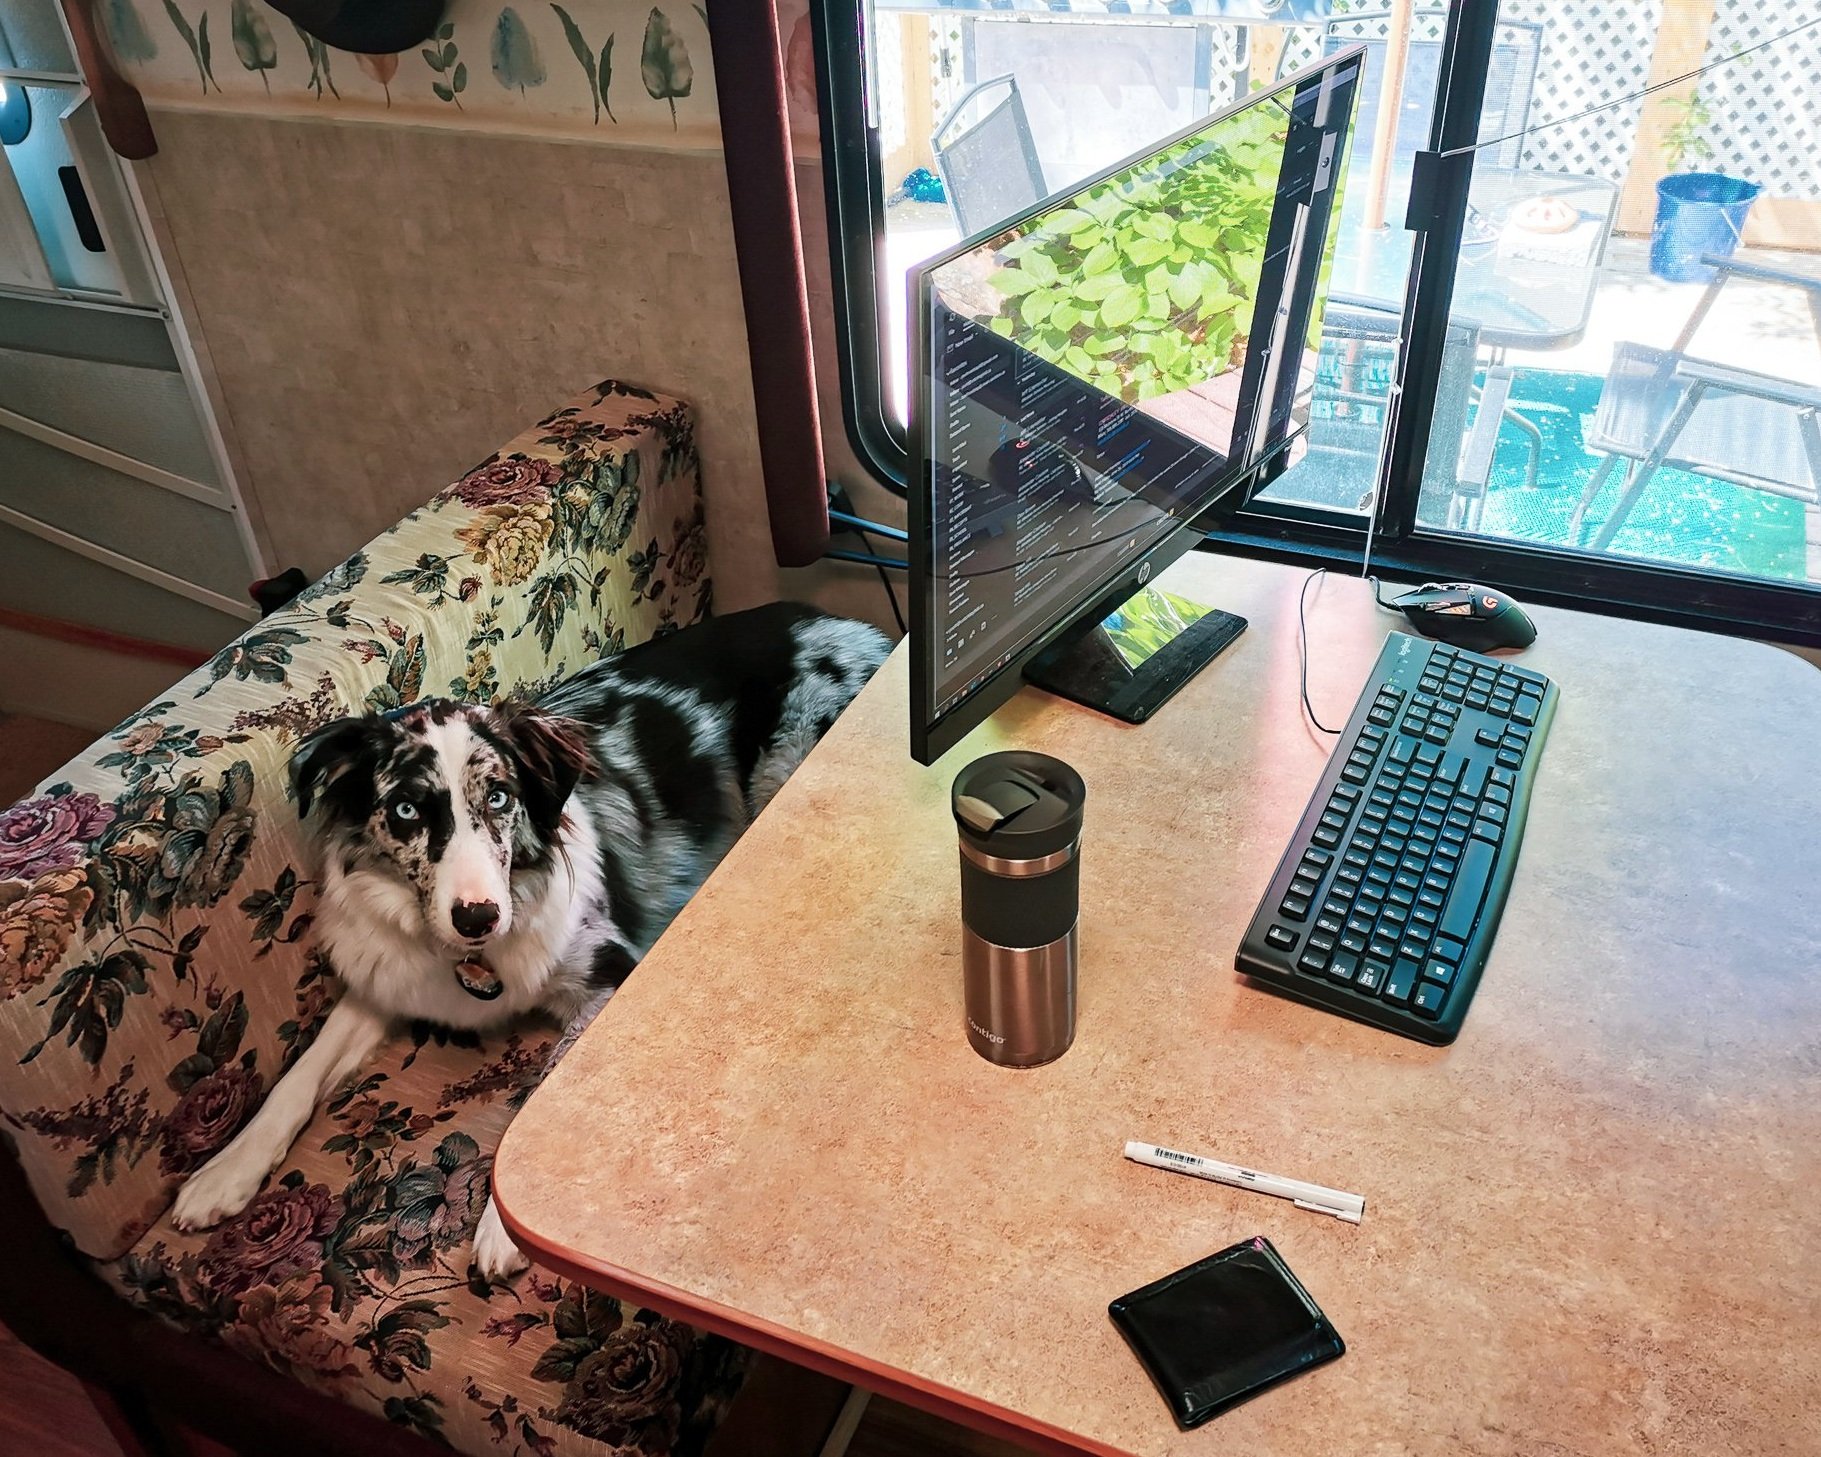
I spent the better part of the summer working full-time for an architecture office from a camping trailer. The move to a trailer was due to the uncertainties caused by the COVID-19 pandemic. At the beginning of June 2020, my wife and I purchased a 26’ Travel Trailer with the intentions of living and working from it – with our dog.
Transitioning from our urban apartment in Gatineau to Joli Voyageur campground in Lavigne, Ontario went relatively smooth minus the fact that we were required to get rid of a lot of stuff. The campground we stayed at offered necessary services such as hydro, sewer, freshwater, and internet. This allowed an online connection, not only for social media but for remote work and communications. My lakeview office was setup in the dinette of our trailer. When I was not working, I would often take the canoe out to go fishing, tend to our garden, or take the dog for a hike. I found myself in a healthy mindset in the midst of a rather uncertain world.
5 - Logistics
The hunt began for the base of my project. There were a few important logistics that I had to figure out early on:
Legal: I opted to start from an existing trailer rather than build from scratch to avoid additional engineering fees that come with legalizing a self-built trailer.
Type: I chose to convert an enclosed cargo trailer as they already have an envelope to work with and are stealthy. Other than that, they are a blank slate.
Size: The smaller the trailer, the more compact and restrictive the design; however, a larger trailer threatens mobility and is more expensive to finish.
Age: The age is important to consider as older trailers are typically plagued with rust and other unforeseeable problems whereas a new unit is too expensive.
Budget: I had to come up with a budget. I would need it to be reasonable, but you get what you pay for. Based on preliminary research, I figured $10,000 is a tight budget. How could I make every dollar count?
Schedule: I would need to be organized and on time. My deadline was the new year of 2021. I would have to account for the winter months and find a workshop space.
6
Learning from my experiences over the summer, I wondered how mobile architecture could be used to reinforce our connection with nature. I started thinking of ways I could bridge work and life. Living and working full time in a campground encouraged the idea that immersing oneself in a recreational setting does not equate a total loss of communication with the working world. My goal became to design and build an architectural object that could take you off-grid in the physical sense but remained connected through today’s technology.
I have always imagined outfitting a small trailer to facilitate the outdoor activities that I pursue. I would need a shelter that I could transport; a place for all of my equipment, something multifunctional that could adjust to the changing of seasons, uses, and landscapes it would find itself in.
This architecture would not be something to live out of full-time, but rather outfitted to support life off-grid during the adventures I may undertake.

This project is about flexibility – it is as much about getting out as it is about going to work.
I began to question the program of the RV. Could architecture operate in a similar fashion as the chuck box? Why couldn’t my camper be an ice fishing shack too? Why stop there? Could it also operate as my mobile office, storage unit and hunt cabin?
7 - Acquiring a trailer
After a few weeks of searching every buy & sell platform, I found a 2019 United XLE 5’x8’ enclosed trailer for a modest asking price on Kijiji. After investigating the trailer and much internal anxiety, I decided to pull the trigger and negotiate the purchase.
On October 6th, 2020, I officially owned a cargo trailer.
After picking up the trailer, I drove home and attempted to reverse it up my steep driveway. Admittedly, it took a few tries – backing up a trailer is trickier than it looks. After it was parked, I unhooked the trailer and moved it (by hand) to a desired location where it would sit securely on jack stands and wheel chocks.

8 - disassembly
Naturally, after having owned the trailer for less than two hours the first thing I decided to do was take it apart. A hammer and pry bar made the perfect tools for this task. The Torx self-tapping screws fit a Robertson #2 drill bit and with the aid of an impact drill made the removal of the fasteners installed by the manufacturer a breeze. With the interior paneling out, I began measuring every inch of my 40sqft project. The trailer has an overall exterior width of 5’-0”, length of 8’-0” and height of 5’-6”. The structure of the trailer is steel members placed approximately 24” on center. Hollow square tubing frames the floor and roof, while the wall studs are top hat sections. The exterior cladding is of thin gauge aluminum panels and the floor is ¾” plywood. The empty weight of the trailer is approximately 820lbs. I sketched detailed drawings of the trailer and developed a 3d model in Rhino.

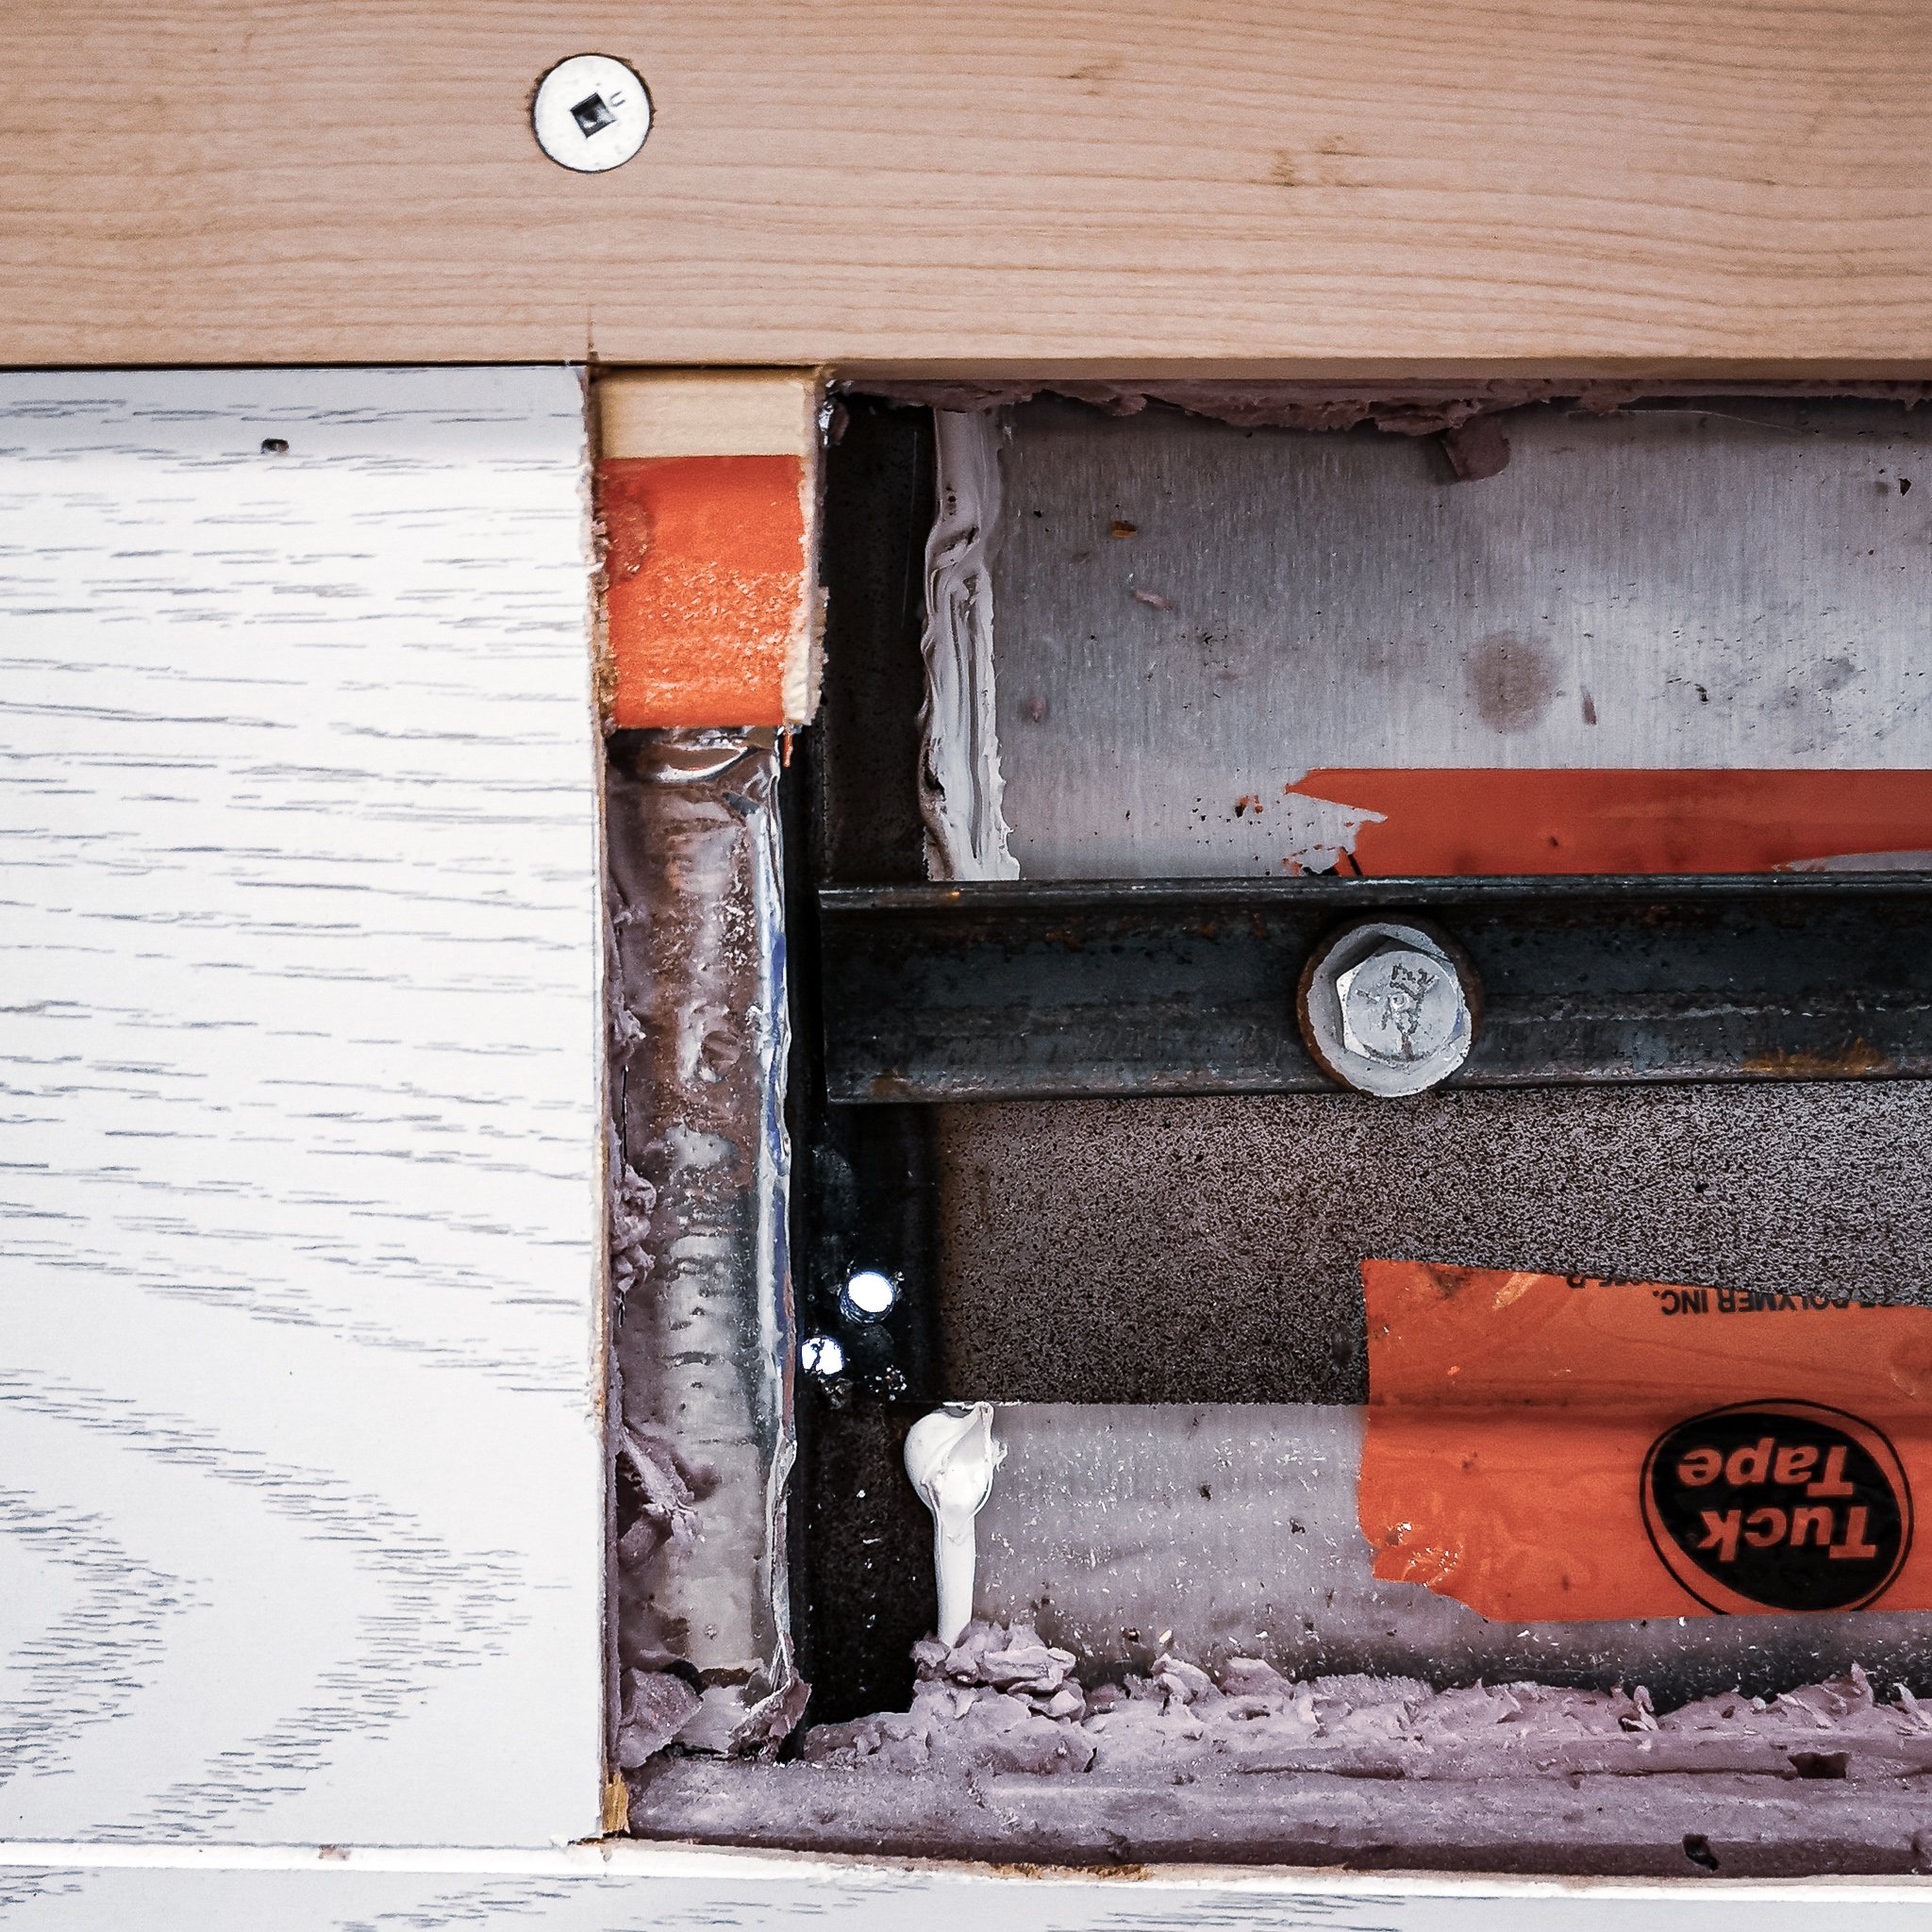
9 - waterproofing
As I dug deeper into the deconstruction of the trailer, I began to understand how it was manufactured. More importantly, I noted all the flaws; its imperfections, and cost-cutting techniques were revealed to me.
Although cargo trailers are structurally better built than RV’s, they lack basic envelope waterproofing details. Fasteners were screwed through the cladding without sealant and the alignment with structural members was poor. I was disappointed to find large gaps in the floor after removing the interior wall panels.
I started fixing these issues by applying a bead of flexible sealant along all the seams at the floor, roof, and wall studs to prevent water ingress. I filled the larger holes and other anomalies with expanding spray foam. After this, I tested my work with a garden hose to ensure that the envelope was truly waterproof.
10 - VENTILATION
To tackle these next steps, I would need to cut holes in the trailer. This was a nerve-racking experience as I only had one chance to get it right. I ordered a roof vent from Amazon and picked up an operable RV window from my local trailer parts supply store. The roof vent, equipped with a fan, would require power to operate. These devices should serve well for air exchange and natural ventilation.
I drew the cut-out inside the trailer making sure to clear any structural members. The cutting was done from the outside. Using a small drill bit, I made a pilot hole so that I could transfer the cut-out template to the exterior. A larger drill bit provided a hole big enough to fit my jigsaw blade. I built interior framing using 2x3 lumber so that the thresholds had solid blocking to be fastened to. I applied butyl tape to the exterior flanges and secured the window and vent with screws to their respective frames. Screws were evenly torqued ensuring an even distribution.
All said and done, the install was quite stressful, but that anxiety was quickly relieved once I experienced how much natural light was coming into the trailer.

11 - insulation
The trailer needed to be insulated if it was going to be inhabited. My 3D model helped quantify how many rigid boards I needed. Having a student budget, I decided to install XPS Rigid insulation instead of spray foam which would have been the superior route. Still, I am getting an R5 per inch; therefore, the overall R value will be between 7.5 and 10. In addition, if for any reason I am required to pull the walls apart I could do so with ease. I avoided the cheaper EPS insulation because it is not moisture resistant and chose not to install the more expensive Polyiso (insulation with reflective layer) as this type loses R value as temperatures drop.
I made a trip to Home Depot and picked up six 1” boards, six 1-1/2” boards, nine ½” boards, and two bottles of general-purpose spray foam. Insulation was cut using a utility knife and straight edge. Panels were press fit into their respective voids, adhered with foam adhesive, and finished with foil tape. An additional layer of insulation was installed over the studs to prevent thermal bridging. The insulation under the floor was installed using 1-3/4” screws with large washers fastened directly to the subfloor.
Eventually, I will have to enclose the exposed insulation underneath so that it does not disintegrate from the salted Canadian winter roads. However, I am confident that the space can be heated efficiently.

12 - security
Traditionally, cargo trailers have not been designed to be inhabited therefore security upgrades were needed. This included the ability to open, close and lock the door from inside the trailer. I tackled this problem by undertaking the installation of a RV door latch. This proved to be one of the more challenging tasks so far. The latch kit did not come with installation instructions, and I had no luck finding supporting resources online. The assumed two-hour task turned into three full days of work.
I started by creating a mock-up with a piece of wood, measuring the latch device for the cut-out. There were a lot of things to consider before cutting a hole in the door such as: alignment, distance to the striking plate, and the thickness of the door compared to the latch. After much struggle, I decided to drill a hole into the door with a “I’ll figure it out on the fly” attitude.
A Dremel was used to clean the cutout. I purposely made the hole small so that I could work my way out as needed, ensuring a tight and secure install. A spacer plate was made to account for the thickness discrepancy between the door and the latching hardware. The assembly was finished with sealant, providing a watertight install.

13 - electrical system
I must admit, I did not realize how complicated and expensive electrical systems are for mobile applications. The whole thesis could focus on these systems alone, but the goal is to explain the key components at an overall level. I am not an expert, but I do feel confident about my newfound knowledge.
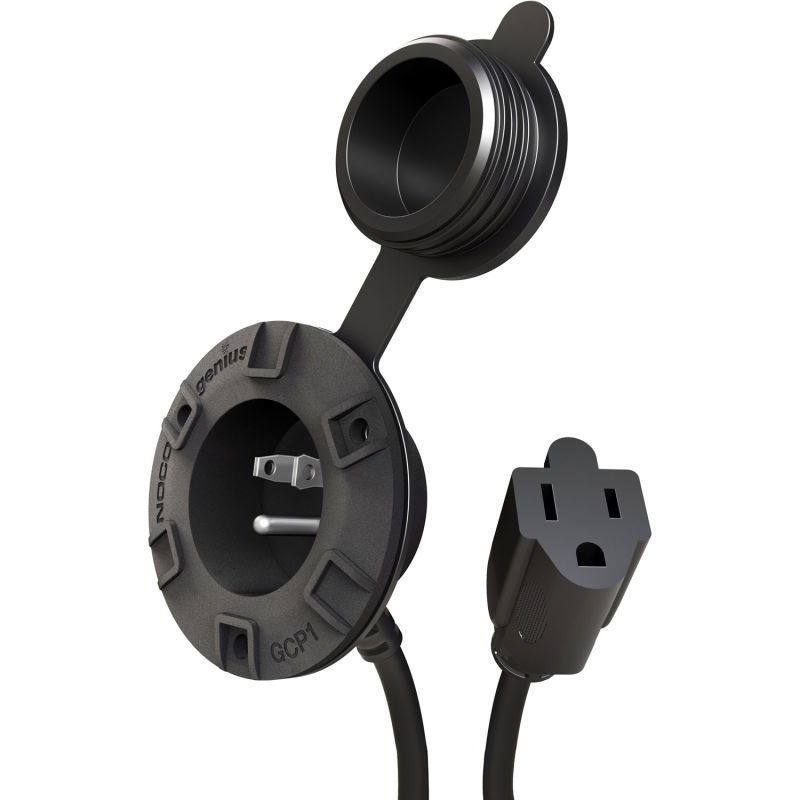
The electrical system can be broken down into four separate categories. The first, a 12V direct current (DC) system to power the lights, fans, fuel pump, cooler, and USB outlets. This type of system is standard in RV and automobile applications. The second is a 120V alternating current (AC) which is found in homes across North America. The AC system powers various household appliances such as a coffee maker, laptop, and crock pot that plug into a standard wall outlet. The third is a shore power system, required for on-grid or generator charging applications. Lastly, the fourth is the solar system, required for off-grid, mobile charging applications. Looking at all the systems separately helps simplify the process, but in the end they all work in tandem, ensuring a fully capable off-grid trailer.
All of the components need to be sized accordingly. There is a fine balance of meeting the minimum requirements, oversizing, and staying under budget. A power audit from explorist.life is used to calculate the total anticipated Amp Hours used per day. This audit gives an approximate size for the components like the battery, inverter, and solar array.
14 – Solar System
The power audit breakdown is abstract. It does not account for different seasons and activities. For example, in the summer a roof fan will be used frequently where a heater will not, but all components need to be accounted for (worst case scenario). Will Prowse offers many DIY videos on YouTube, and his book explains in more detail all of these considerations. To assist visualizing the layout of the components, I created a detailed wiring diagram (not to scale).
After a lot of research, I have made a few reflections:
You get what you pay for.
There are pros and cons to everything.
Trust expert advice. I have Richard Peters from the Sault College of Applied Arts and Technology to thank for all his help.
Ordering all of these components online is stressful.
On November 21st, 2020, I placed the largest Amazon order of my life. Not just in cost but in scale. At the time I placed the order, it did not feel real. It was not until the packages started to arrive that I began questioning my life choices. Why is the inverter so heavy? Did I get the right solar panel?
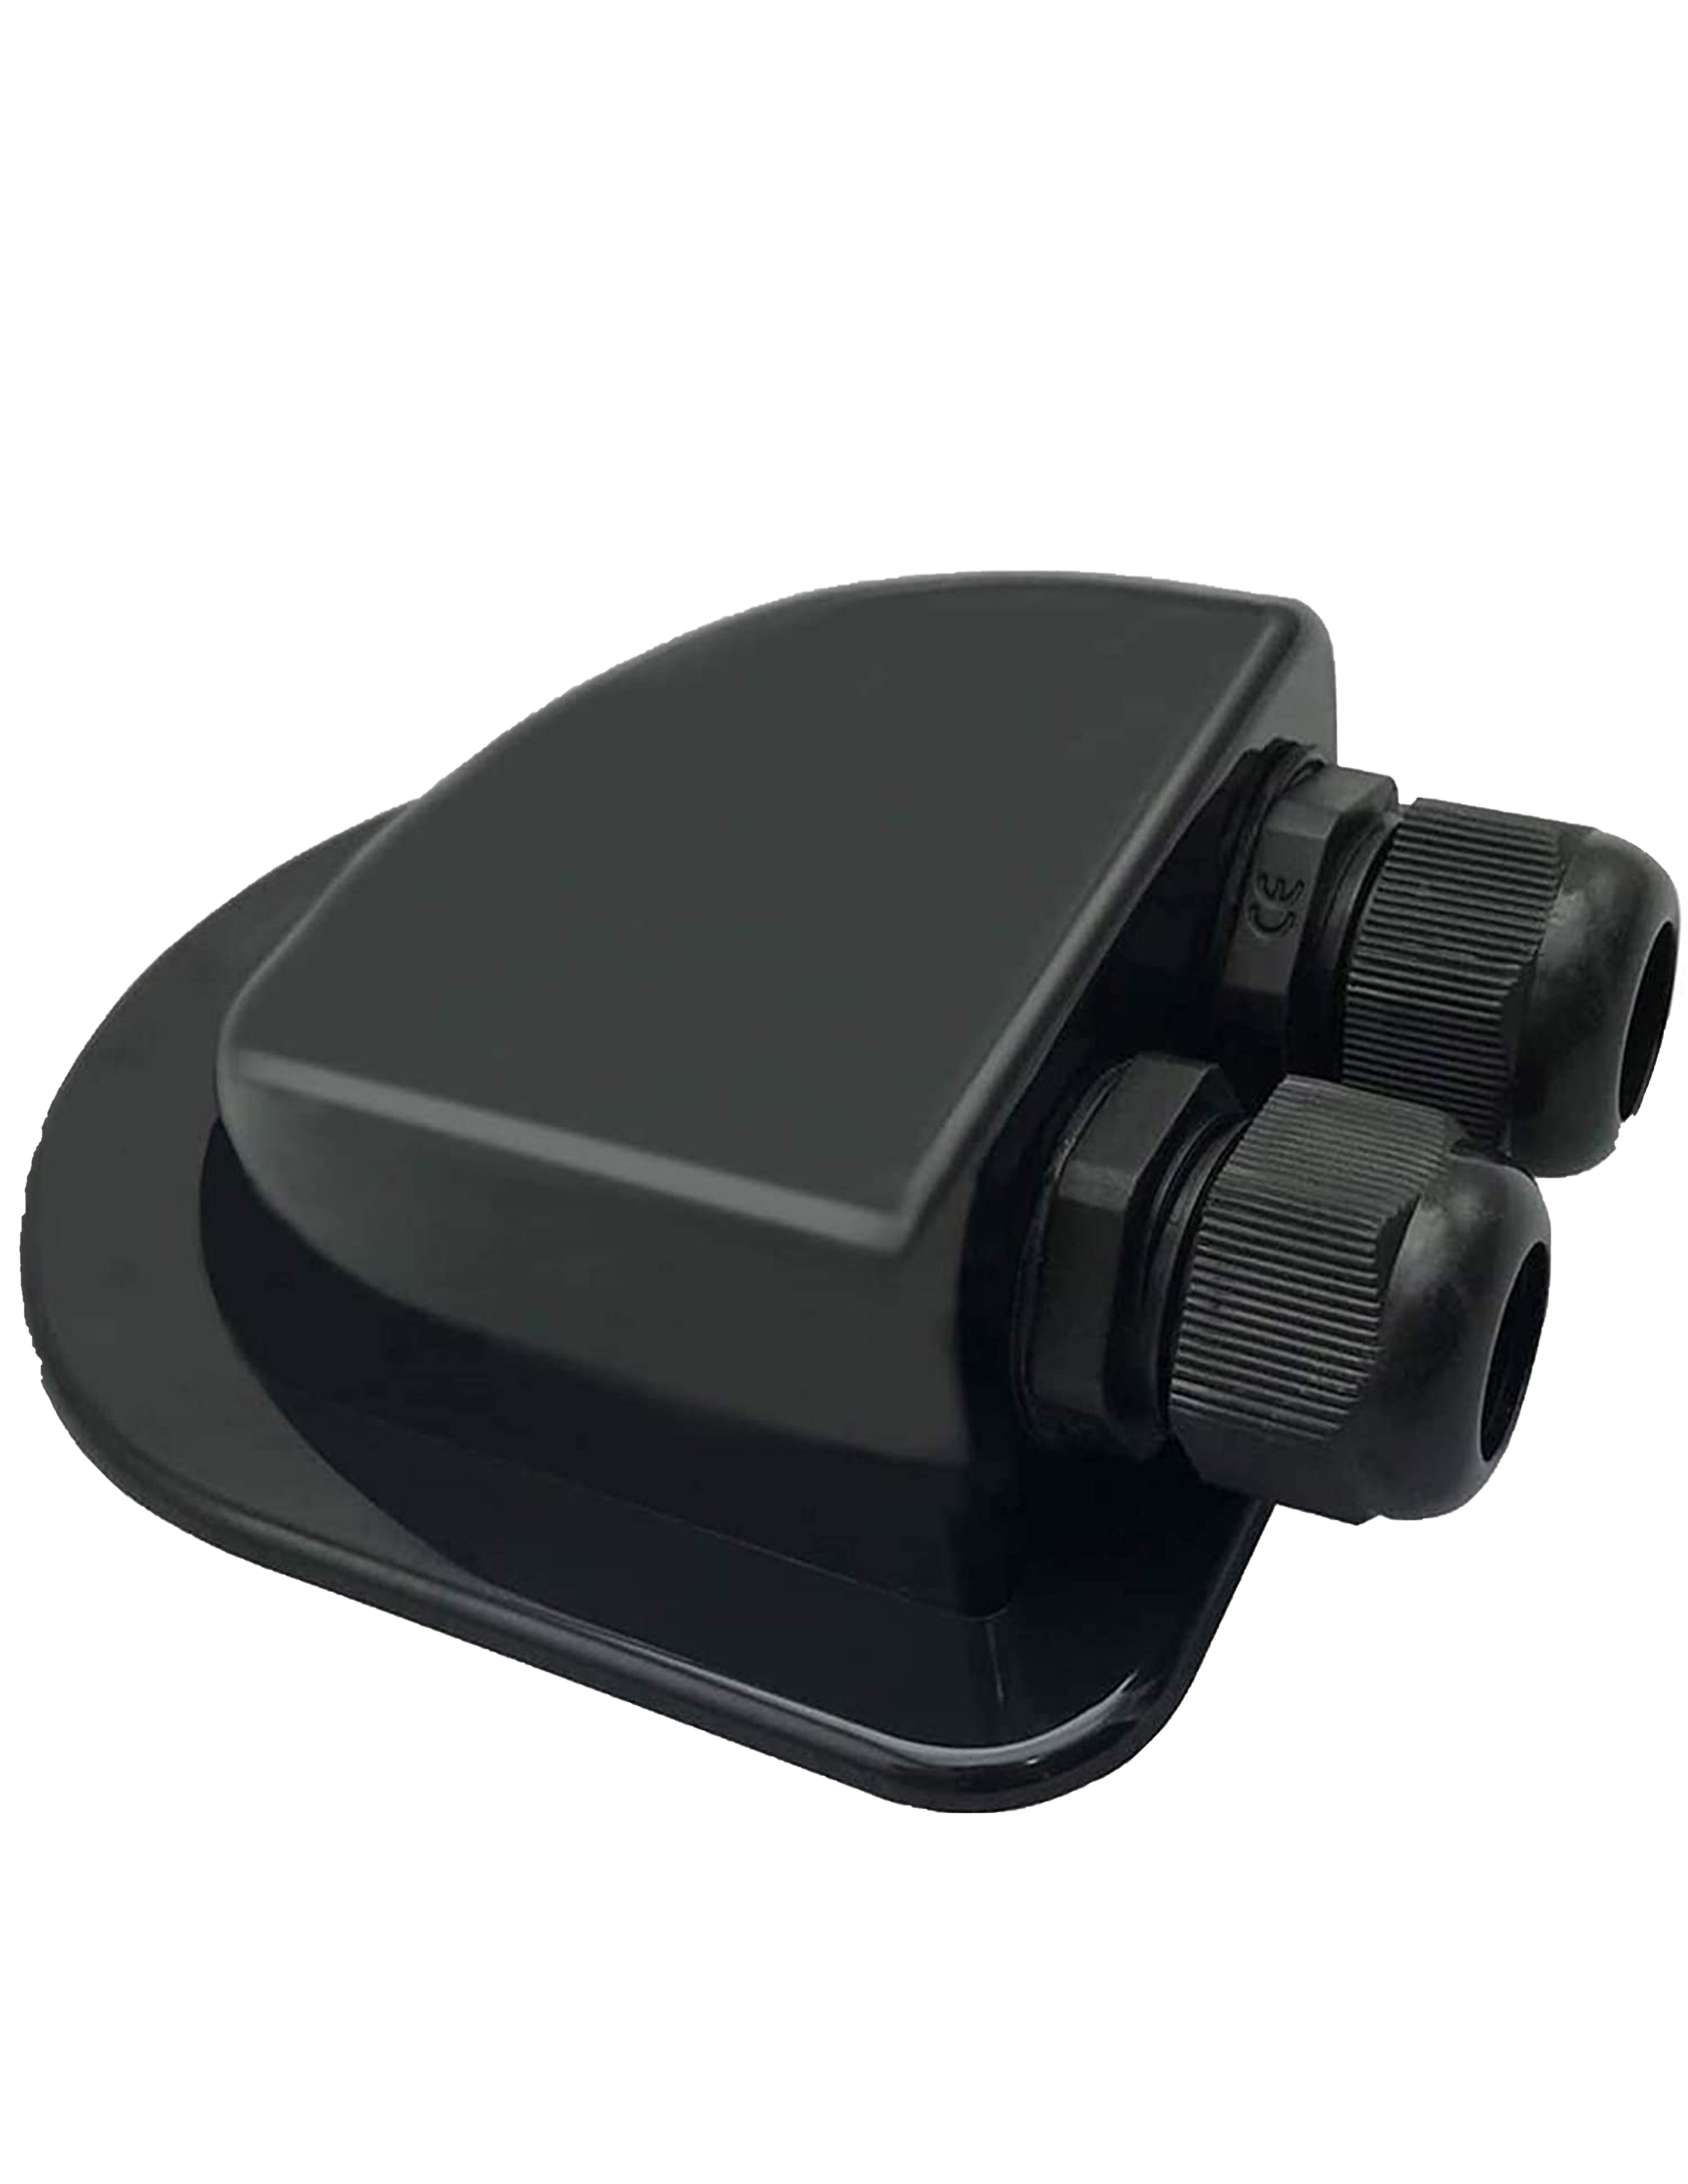
BELOW IS A LIST OF THE EQUIPMENT I USED FOR THIS BUILD
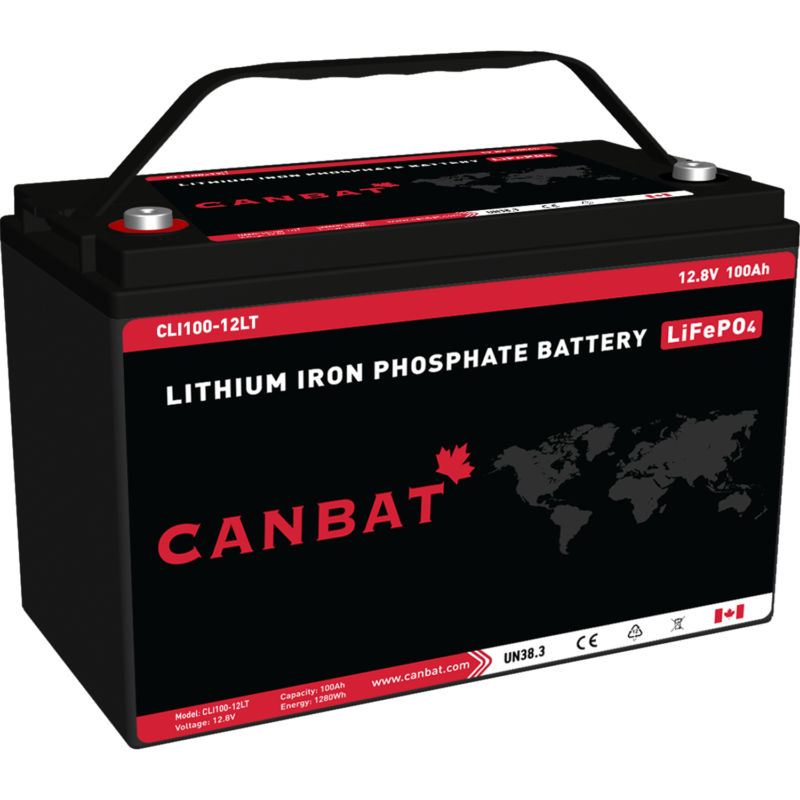
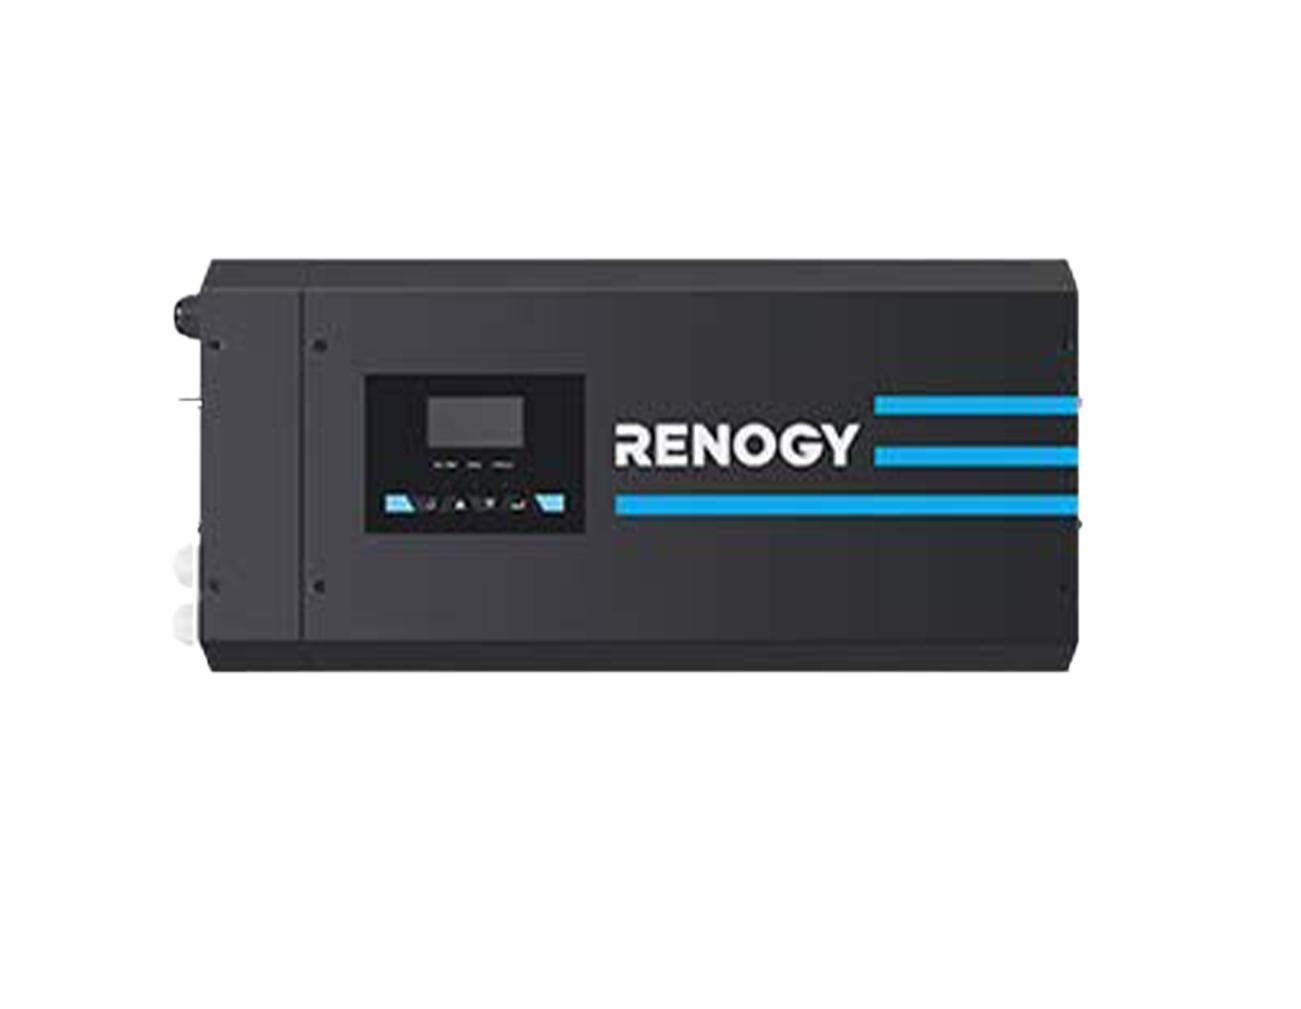
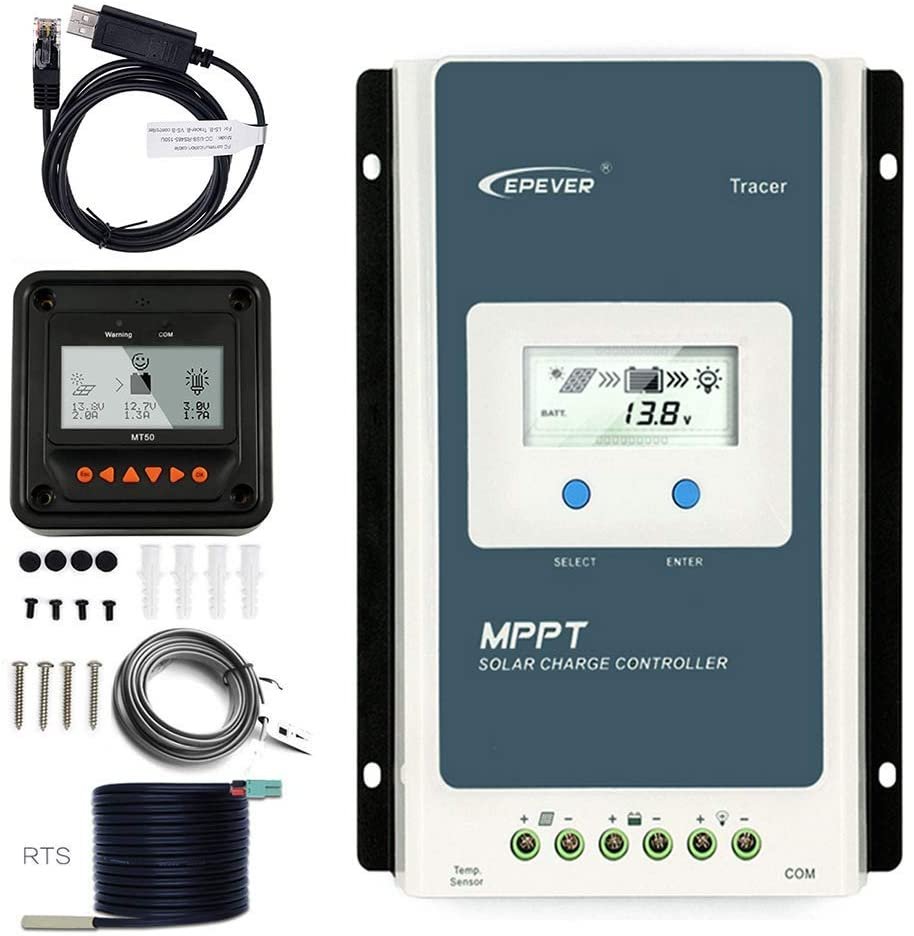


*With a purchase of products using the discount links above, I will receive a small commission at no extra cost to you! This supports the channel and funds future projects!

15 - ELECTRICAL WIRING
The wiring to the lights, fan, and outlets as well as the switches to control them needed to be installed before the walls could be finished. I used 14-gauge stranded wire for the 12V DC appliances, and 14/3 stranded wire for the 120V AC outlets. I never plan on drawing more than 15amps; therefore, this gauge of wire will suffice. Stranded copper wire was used over solid core because vibrations can cause the wire to split or detach from their terminals. Wires were crimped with terminal connectors and finished with heat shrink.
I installed an outlet and LED light strip on the door where the kitchen will be. To run power to these I designed a flexible conduit which was inspired by the similar application found on vehicle doors. This conduit operates with the pivot of the door, keeping the wires inside protected.
Wiring in the battery, inverter, and solar charge controller required special attention. Every component was protected with a circuit breaker. Each run of wire was sized according to the length and current of electricity that would pass through. Thick 2/0 cable links the battery to the inverter, 8awg wire links the solar charge controller to the battery, and 4awg wire links the battery to the 12V fuse panel.
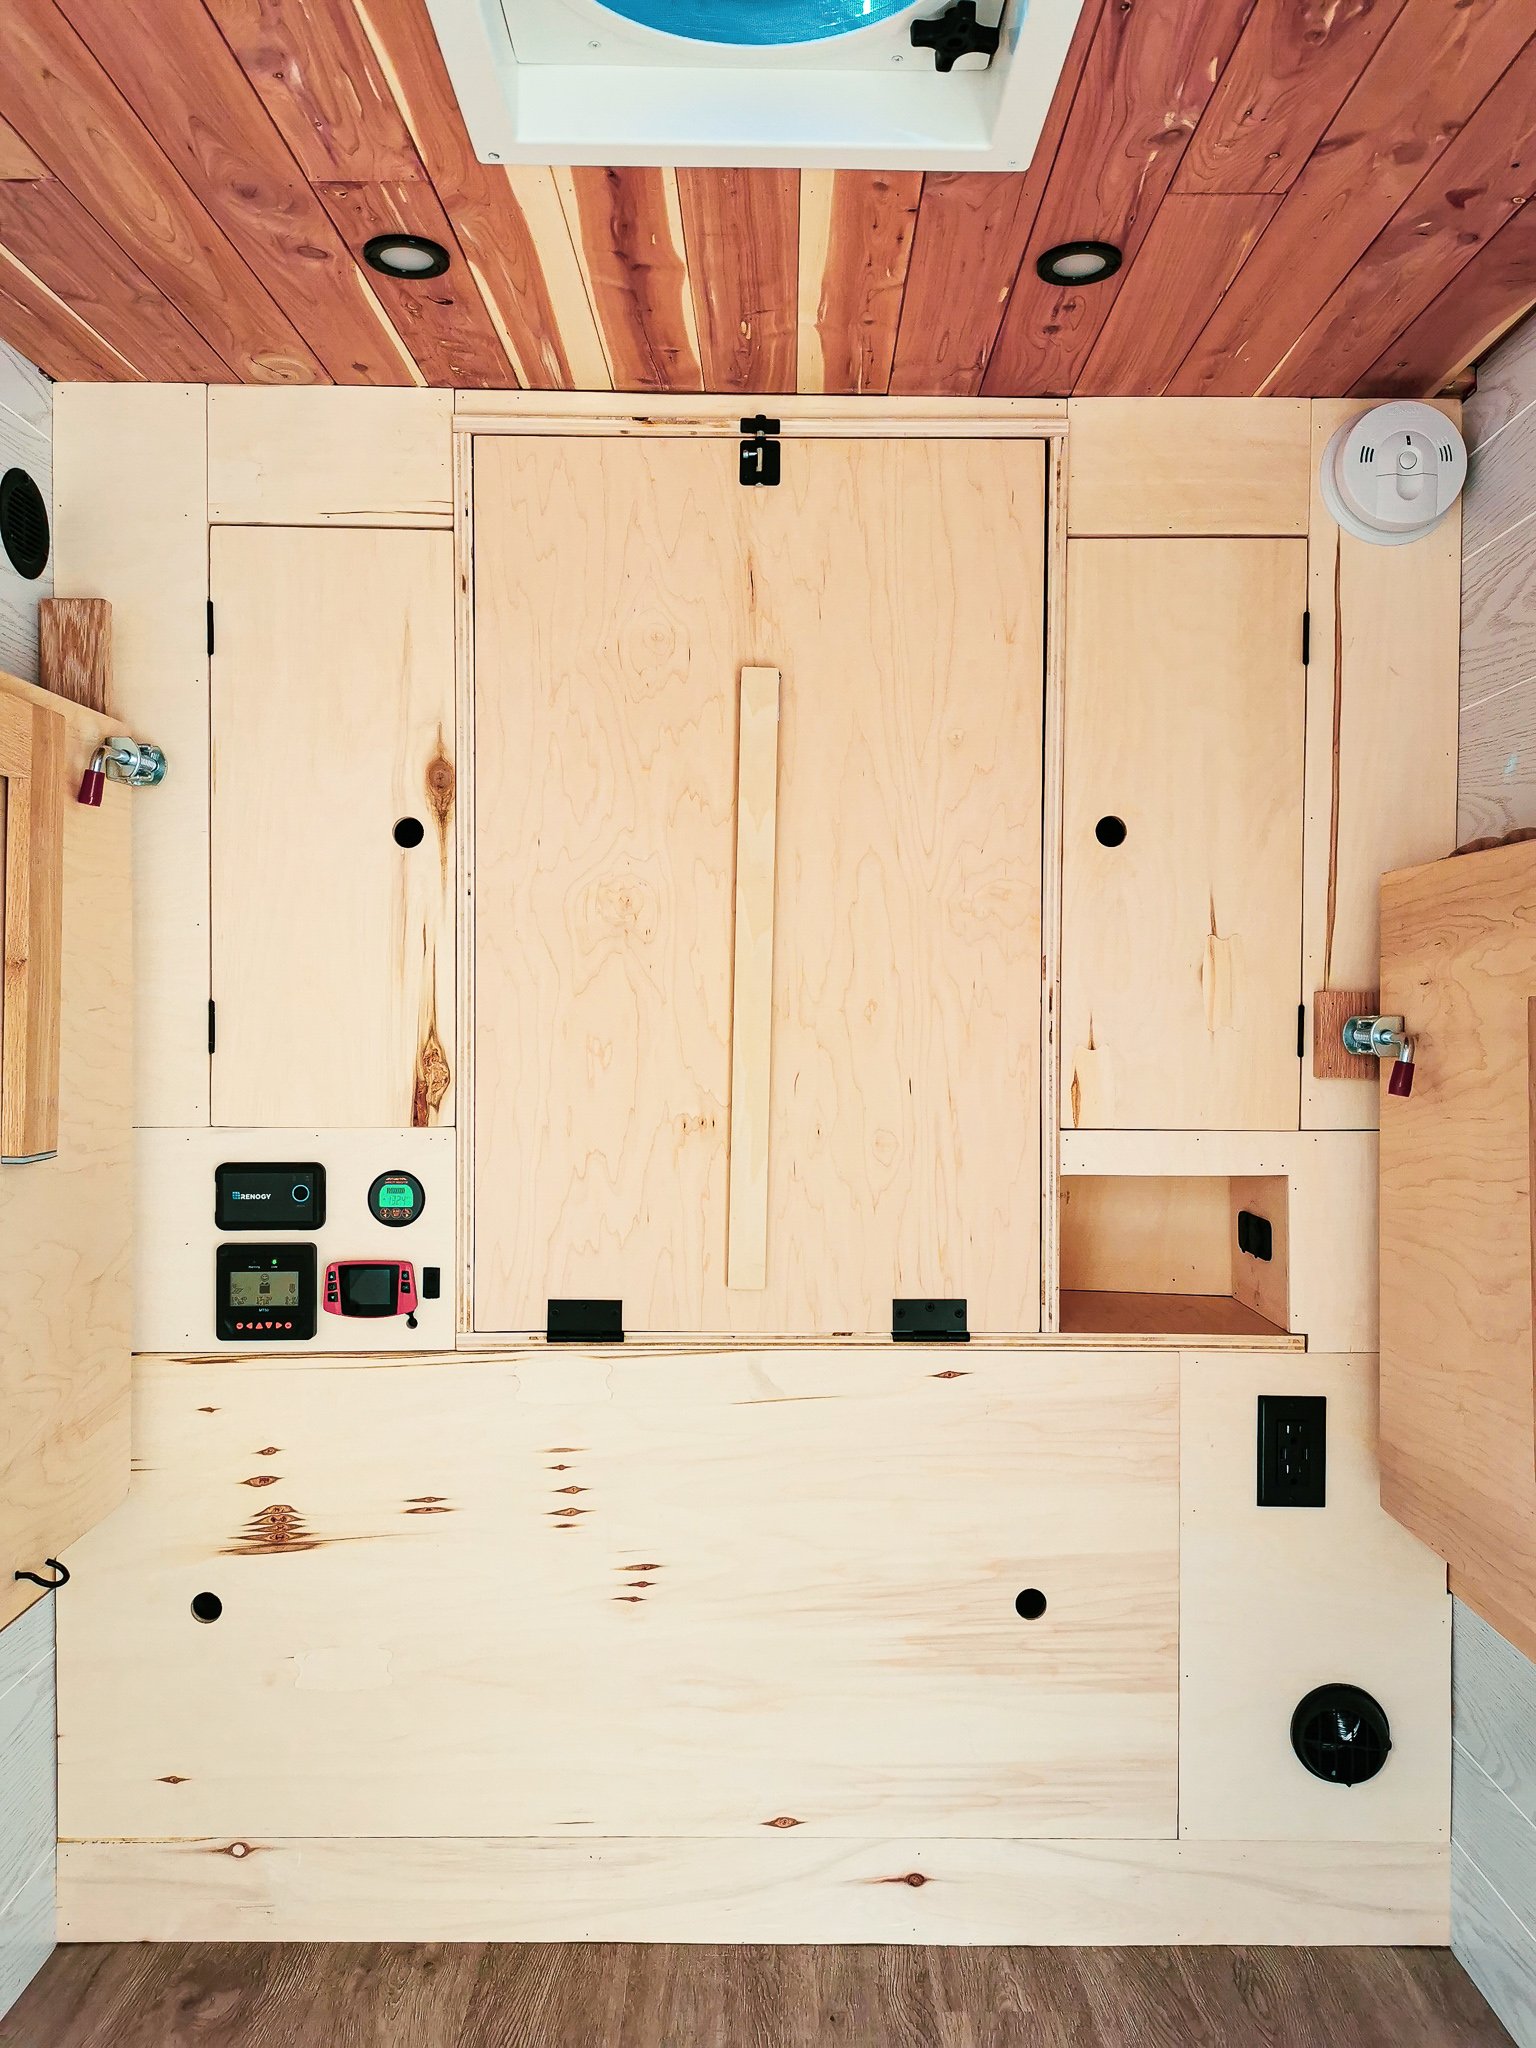
I installed six 2W LED puck lights on the ceiling. These were routed to a 12V RV switch located at the entrance. The switch was then routed to the fuse panel at the front of the trailer. I tucked the wires neatly between the wall finish and strapping. Flicking the ceilings lights on for the first time was an exciting and fulfilling moment.
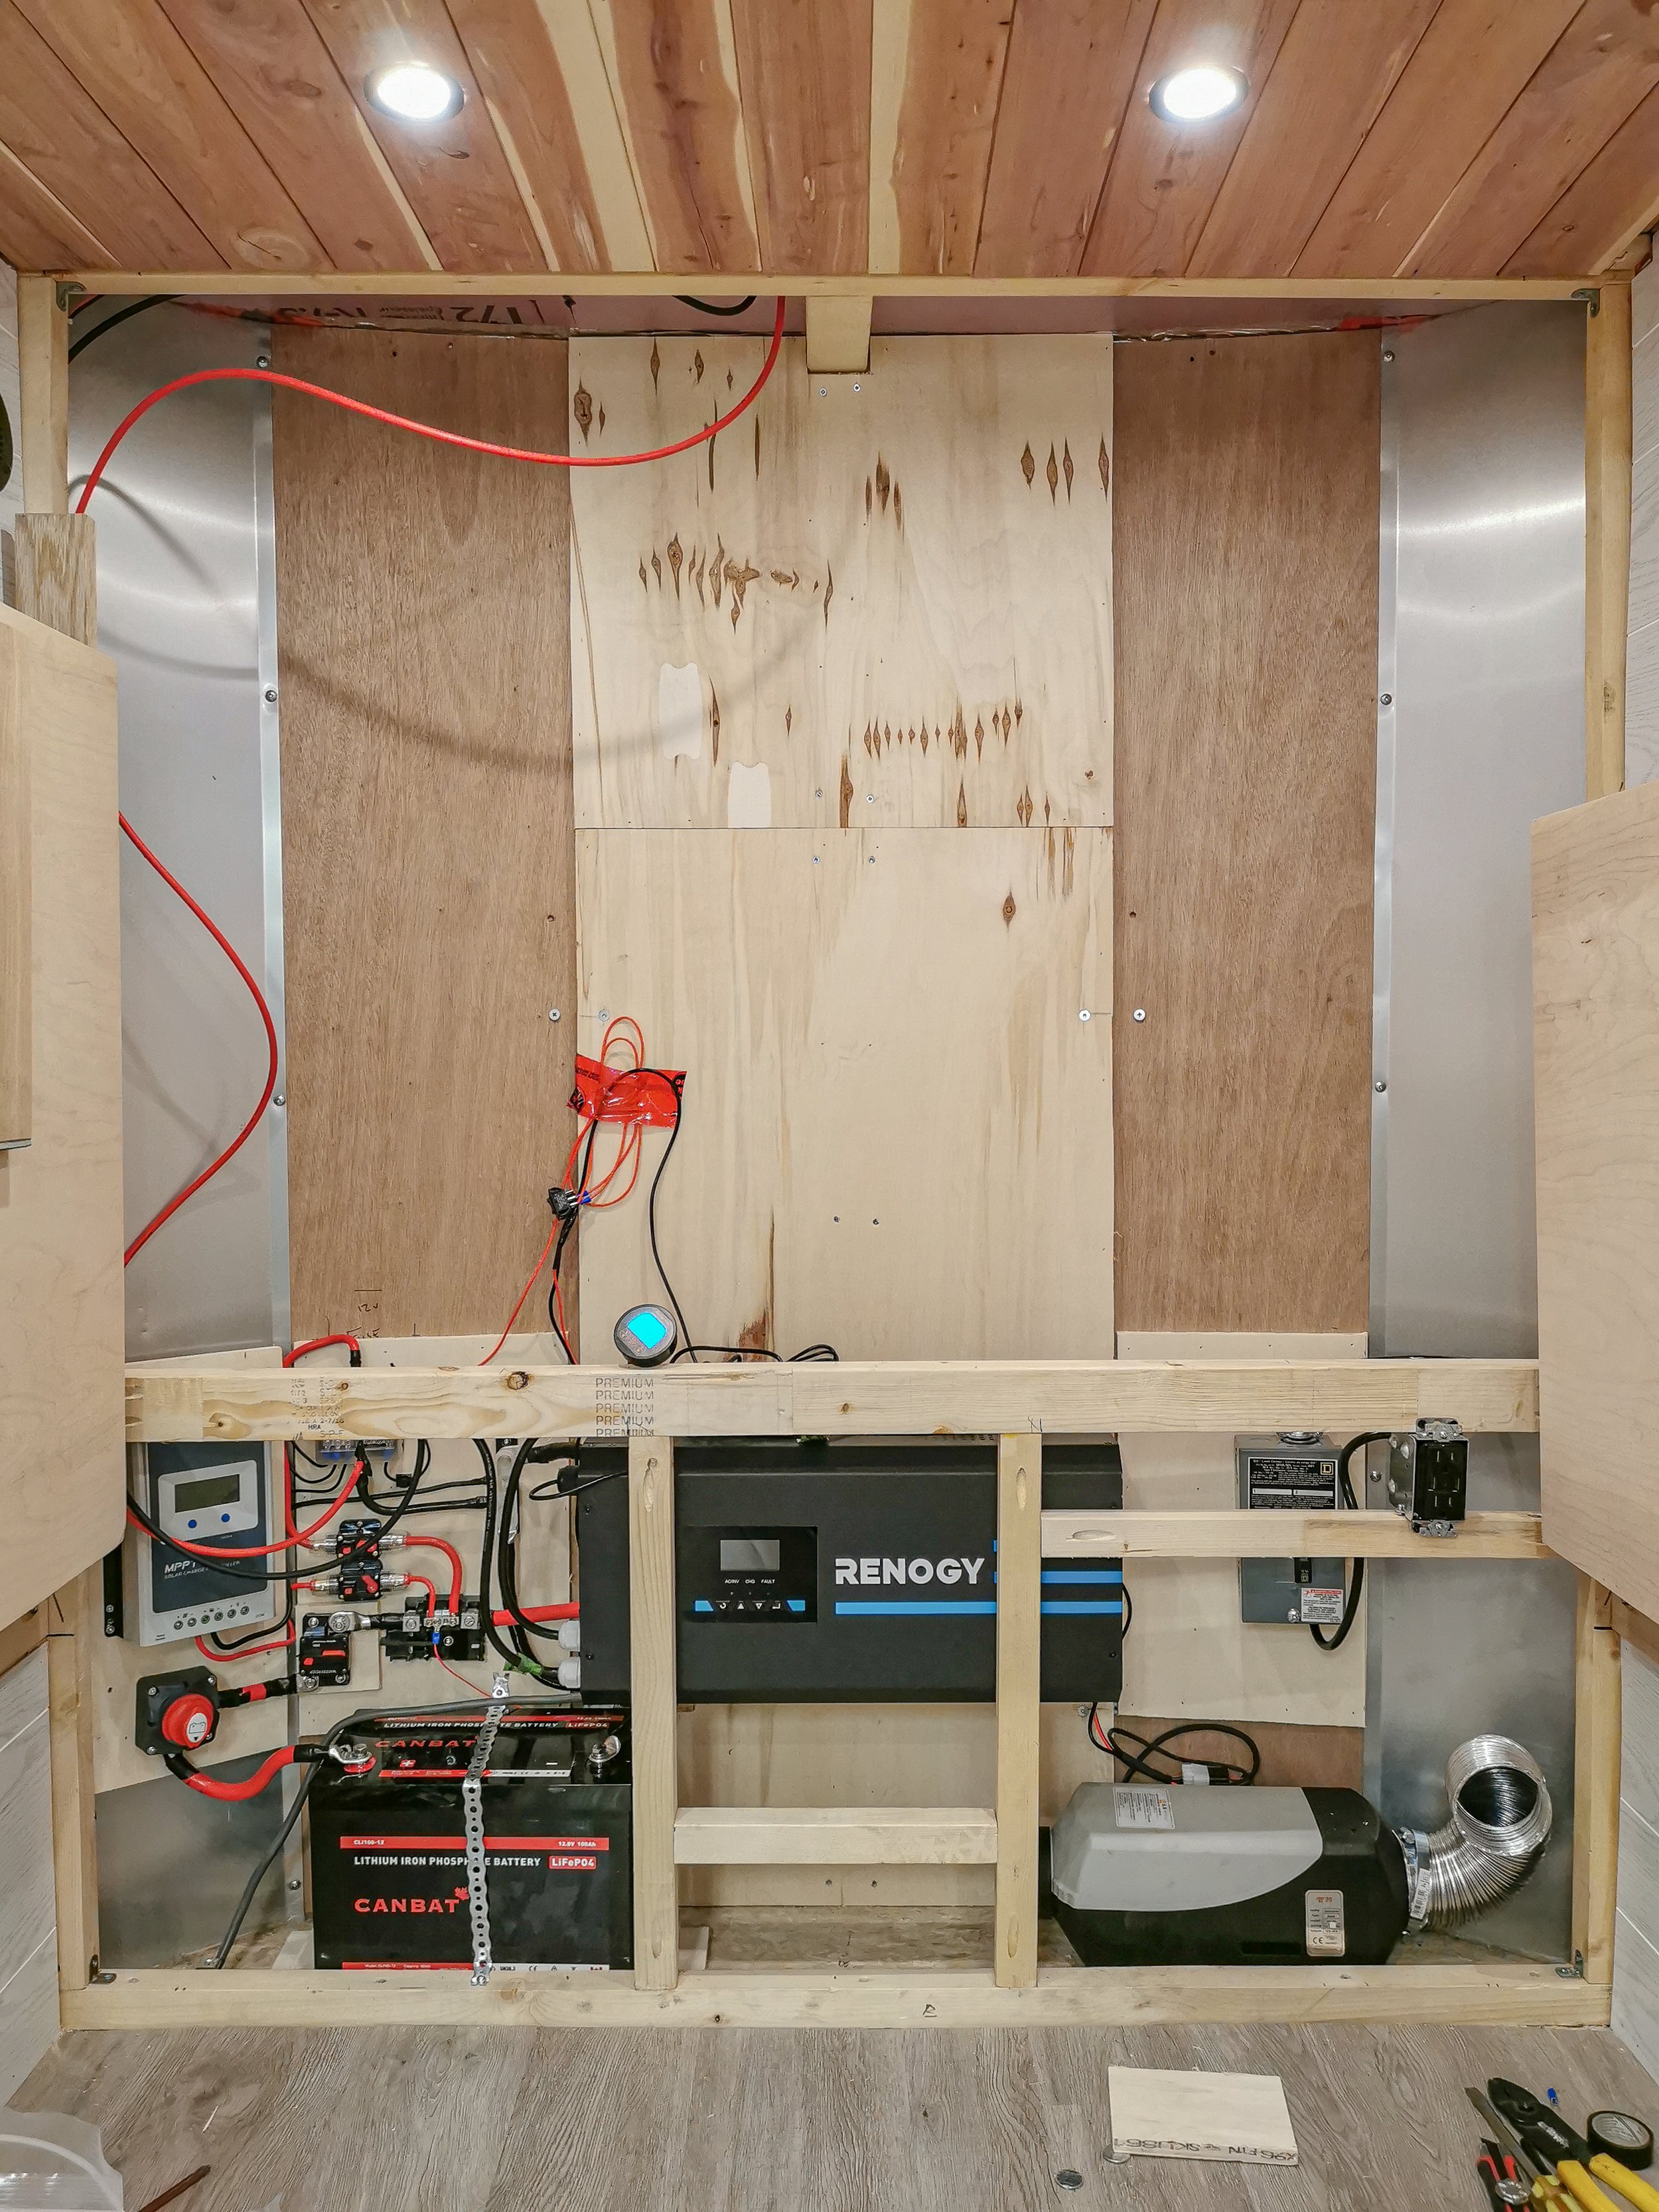
16 - HEATING
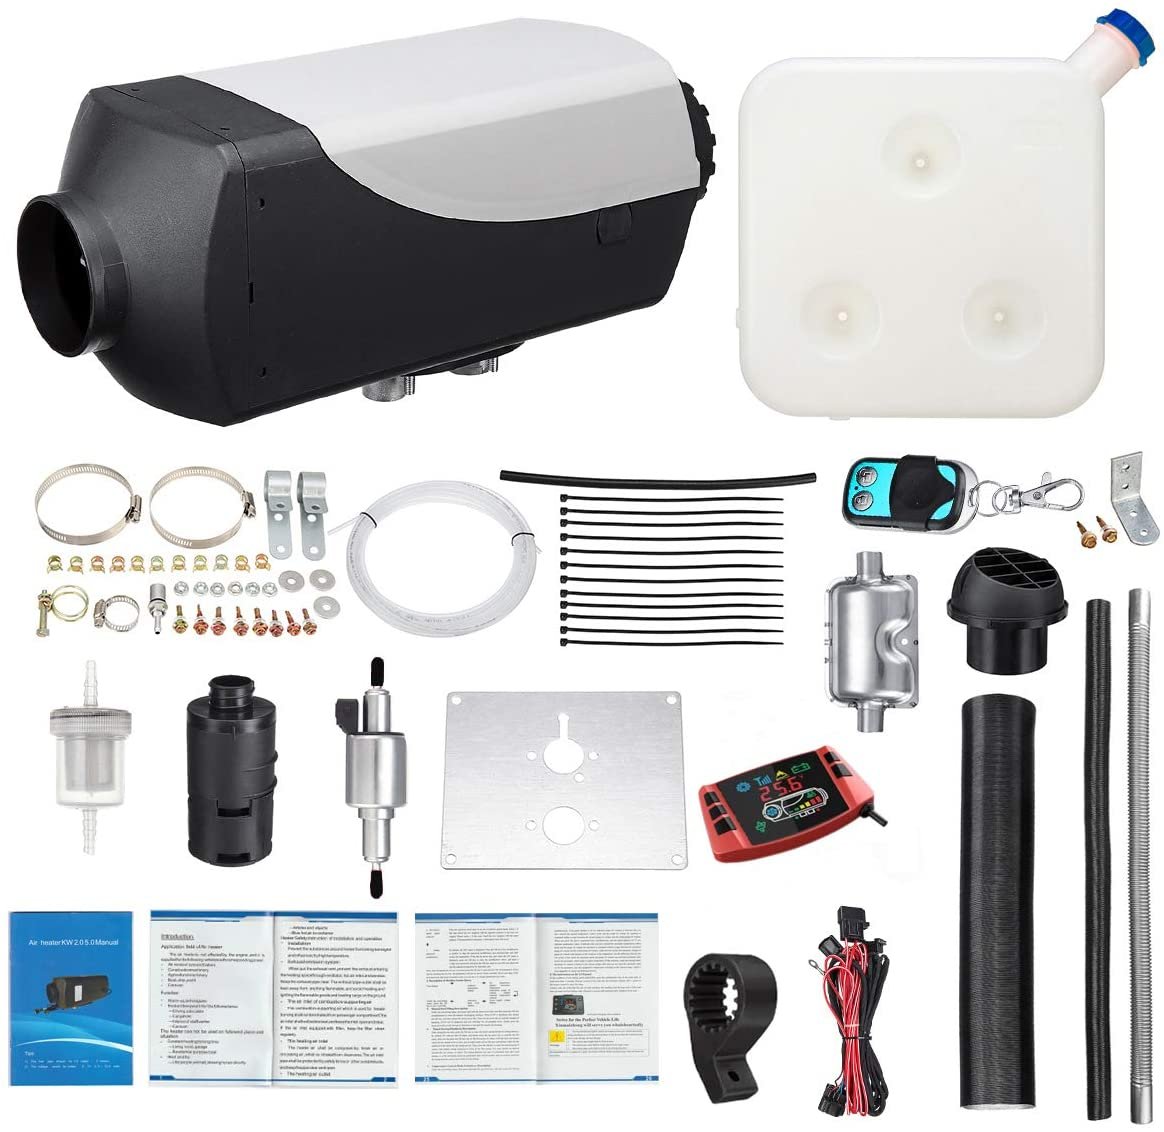
There was much debate on what method would be the best to heat the space. An electric space heater would require a much larger battery bank. Propane would be a viable option, but they have known moisture problems if not vented properly. For this project, I decided to install a small diesel air heater. These units are gaining popularity in the van-life movement because they are one of the most effective ways to heat mobile spaces. Historically, diesel heaters are installed in transport truck bunks.
Just like the solar and electrical components, both expensive brand-name units and cheap knockoffs are available. Knowing the risks and having spent most of the budget on solar equipment, I opted to purchase a cheaper diesel air heater from Amazon. I chose a 5KW (equivalent to 17,061BTU/hr) heater made by Tseipoaoi. This heater is a 12V system and burns either diesel or kerosene.
The price tag of just under three hundred dollars bought me a complete kit including: the air heater, fuel cell, fuel line, fuel pump, filter, muffler, heater hose, remote control, air intake, and wiring harness. I installed the heater in the space allocated in front of the trailer. After many suggestions from individuals on YouTube, I changed my design of having the hot air output three feet above the floor to just a few inches. I installed the fuel tank, fuel pump, and filter remotely on the tongue of the trailer in a storage box which was purchased from Princess Auto. At this point, my trailer would be able to heat itself independently as long as it has fuel and power.

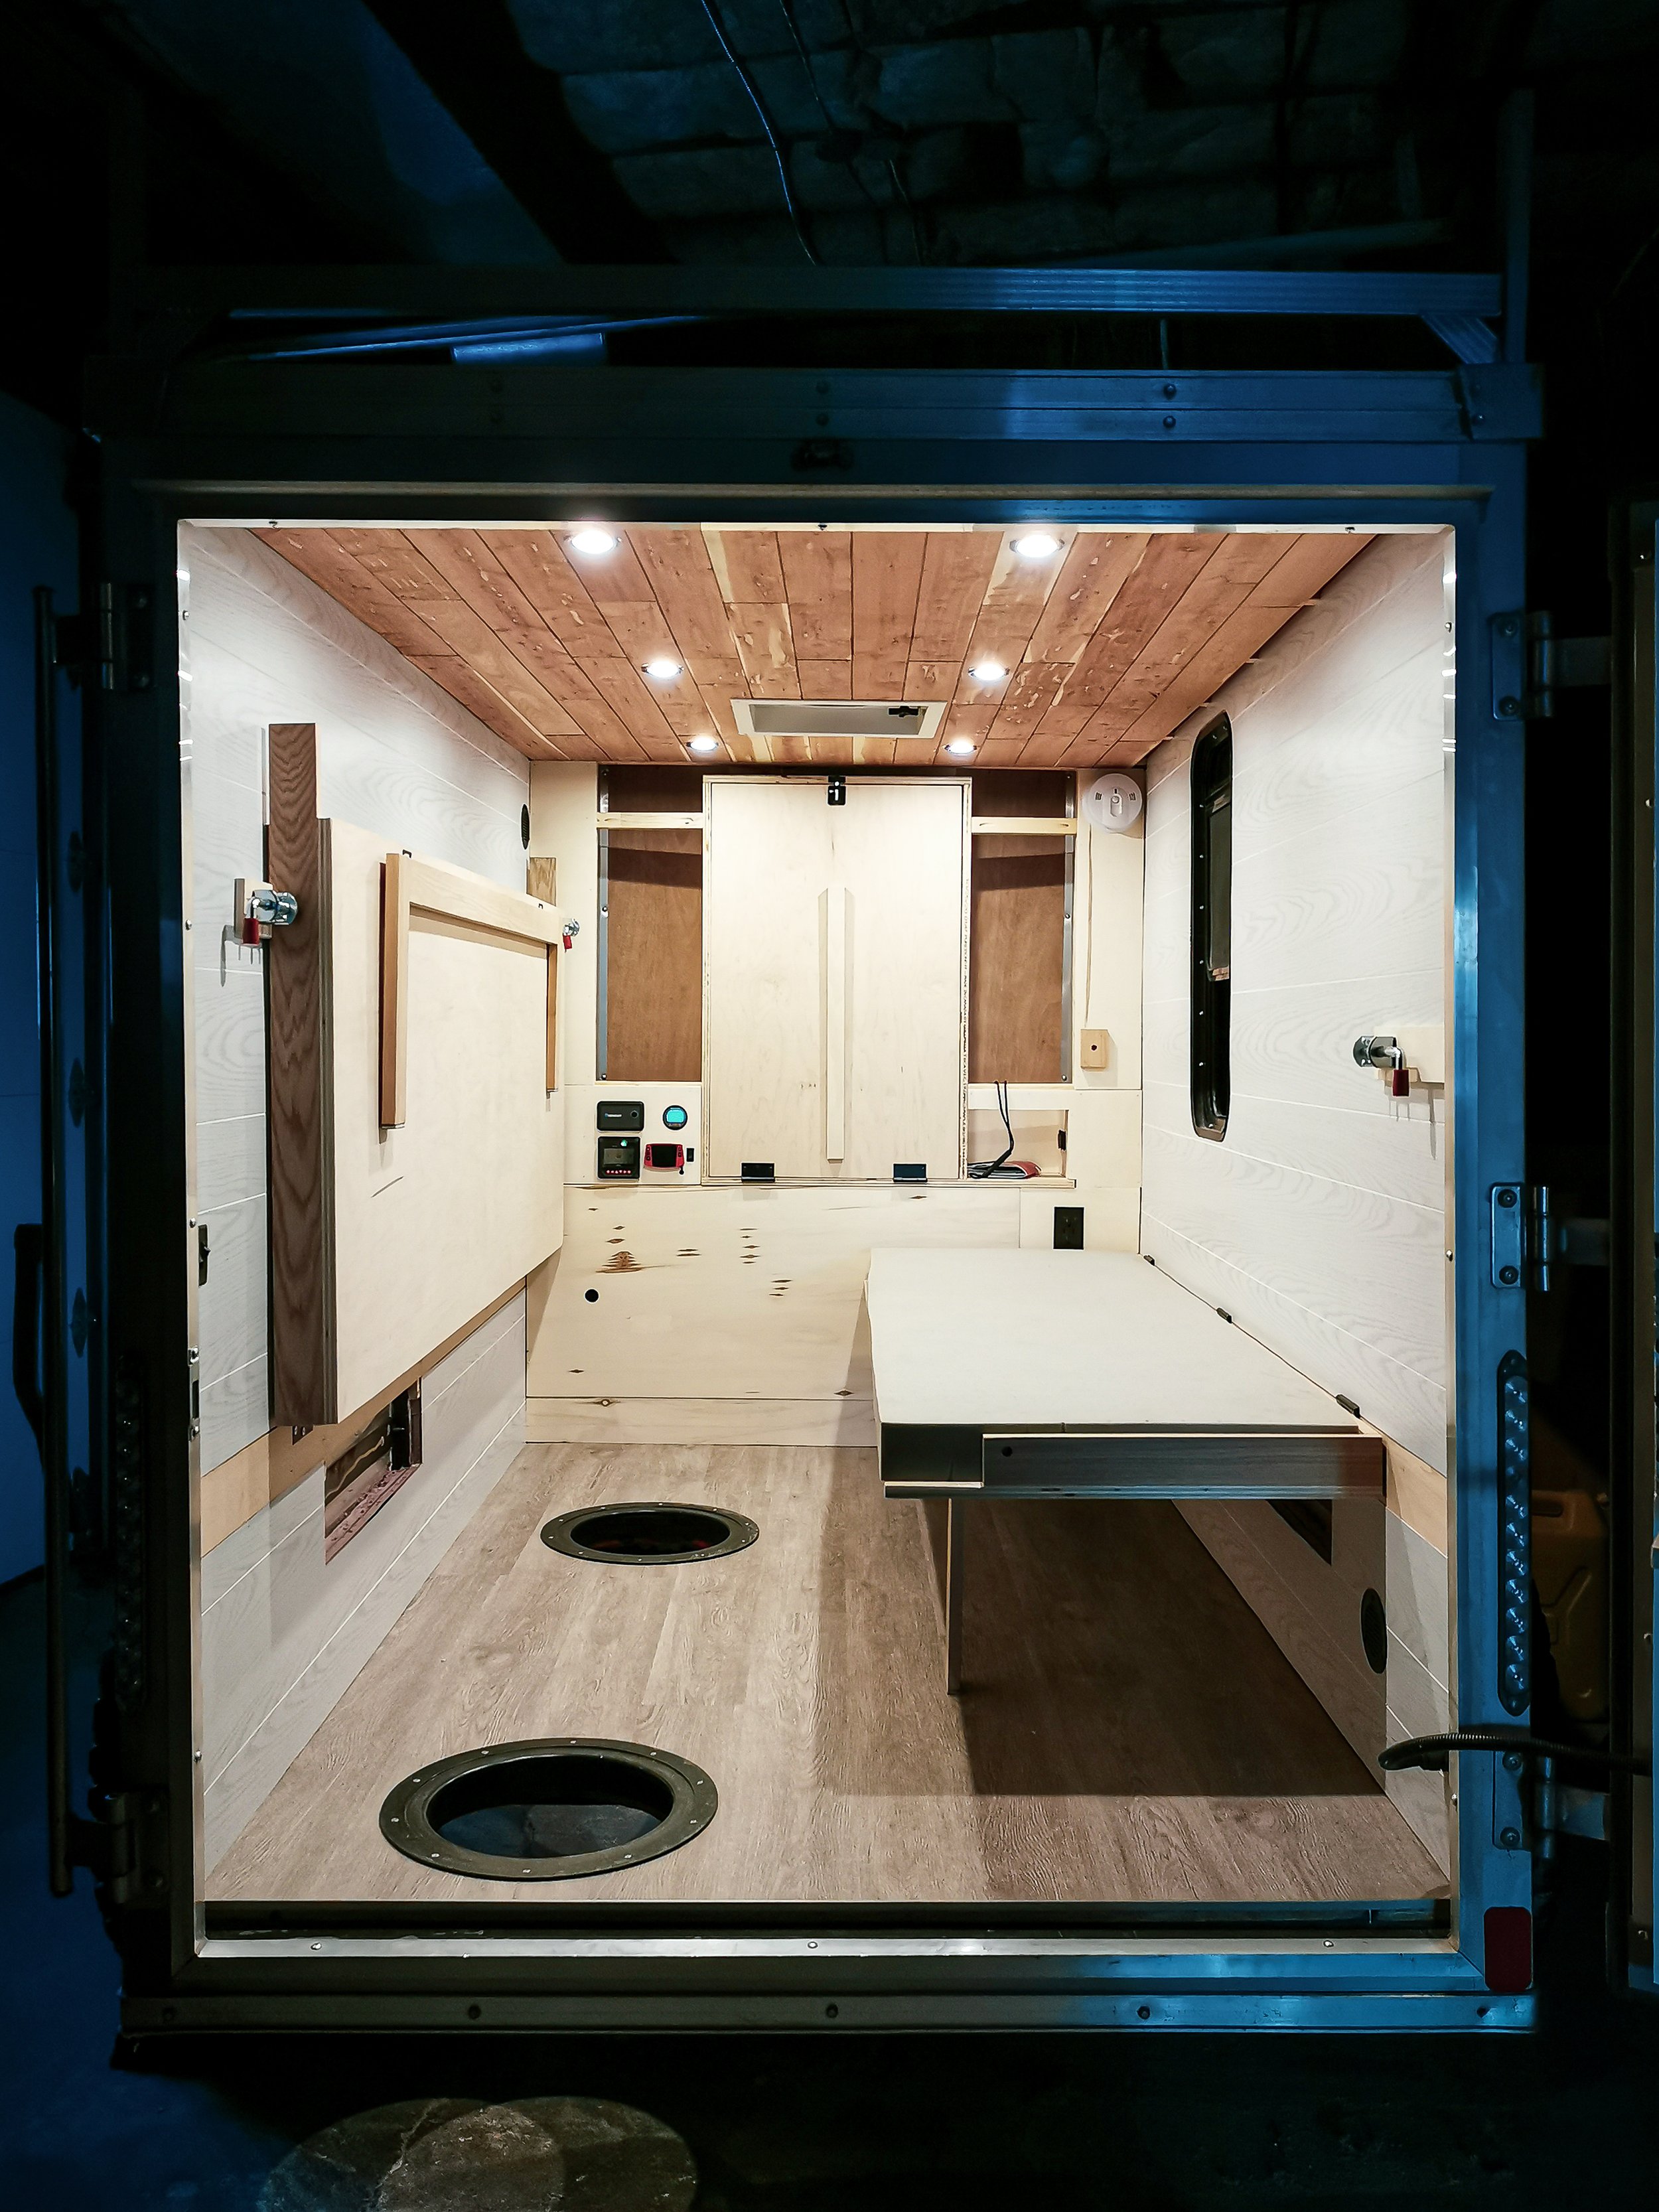
17 - FINISHES
I had been installing architectural finishes throughout various moments of the build. I started collecting various samples from Home Depot and creating material palette boards. I had to be mindful beyond the cost and aesthetics of the materials. I had to consider the thickness, weight, and durability as they all have a drastic impact on the outcome of the space.
For the floor, I installed waterproof luxury vinyl tile on top of a ¼” foam underlayment. Shortly after having installed the new flooring, I cut two large holes to accommodate ice fishing catch covers. The walls were finished with 2.7mm white ash panel board. The front wall and associated millwork were fabricated with ½” finished ash plywood. I splurged a little for the ceiling, installing ¼” aroma cedar planks. I installed a ¾” thick maple hardwood rail along both sides of the trailer for a mounting surface to support the bed. I built the bedframe using ¾” pure bond maple plywood and solid oak. Depending on the use of the space, the bed can be folded up and away, pivoted semi-down as a bench, or completely down as a full-size bed. The kitchen worksurface is mounted on pivoting brackets which can be locked either in the up or down position. The backside of the bookshelf can be folded down and used as a worksurface.
I am pleased with the outcome of the ceiling as I am learning the power of how this plane influences spaces, especially small ones. I am finally able to appreciate the finishes come together and give the space its identity.

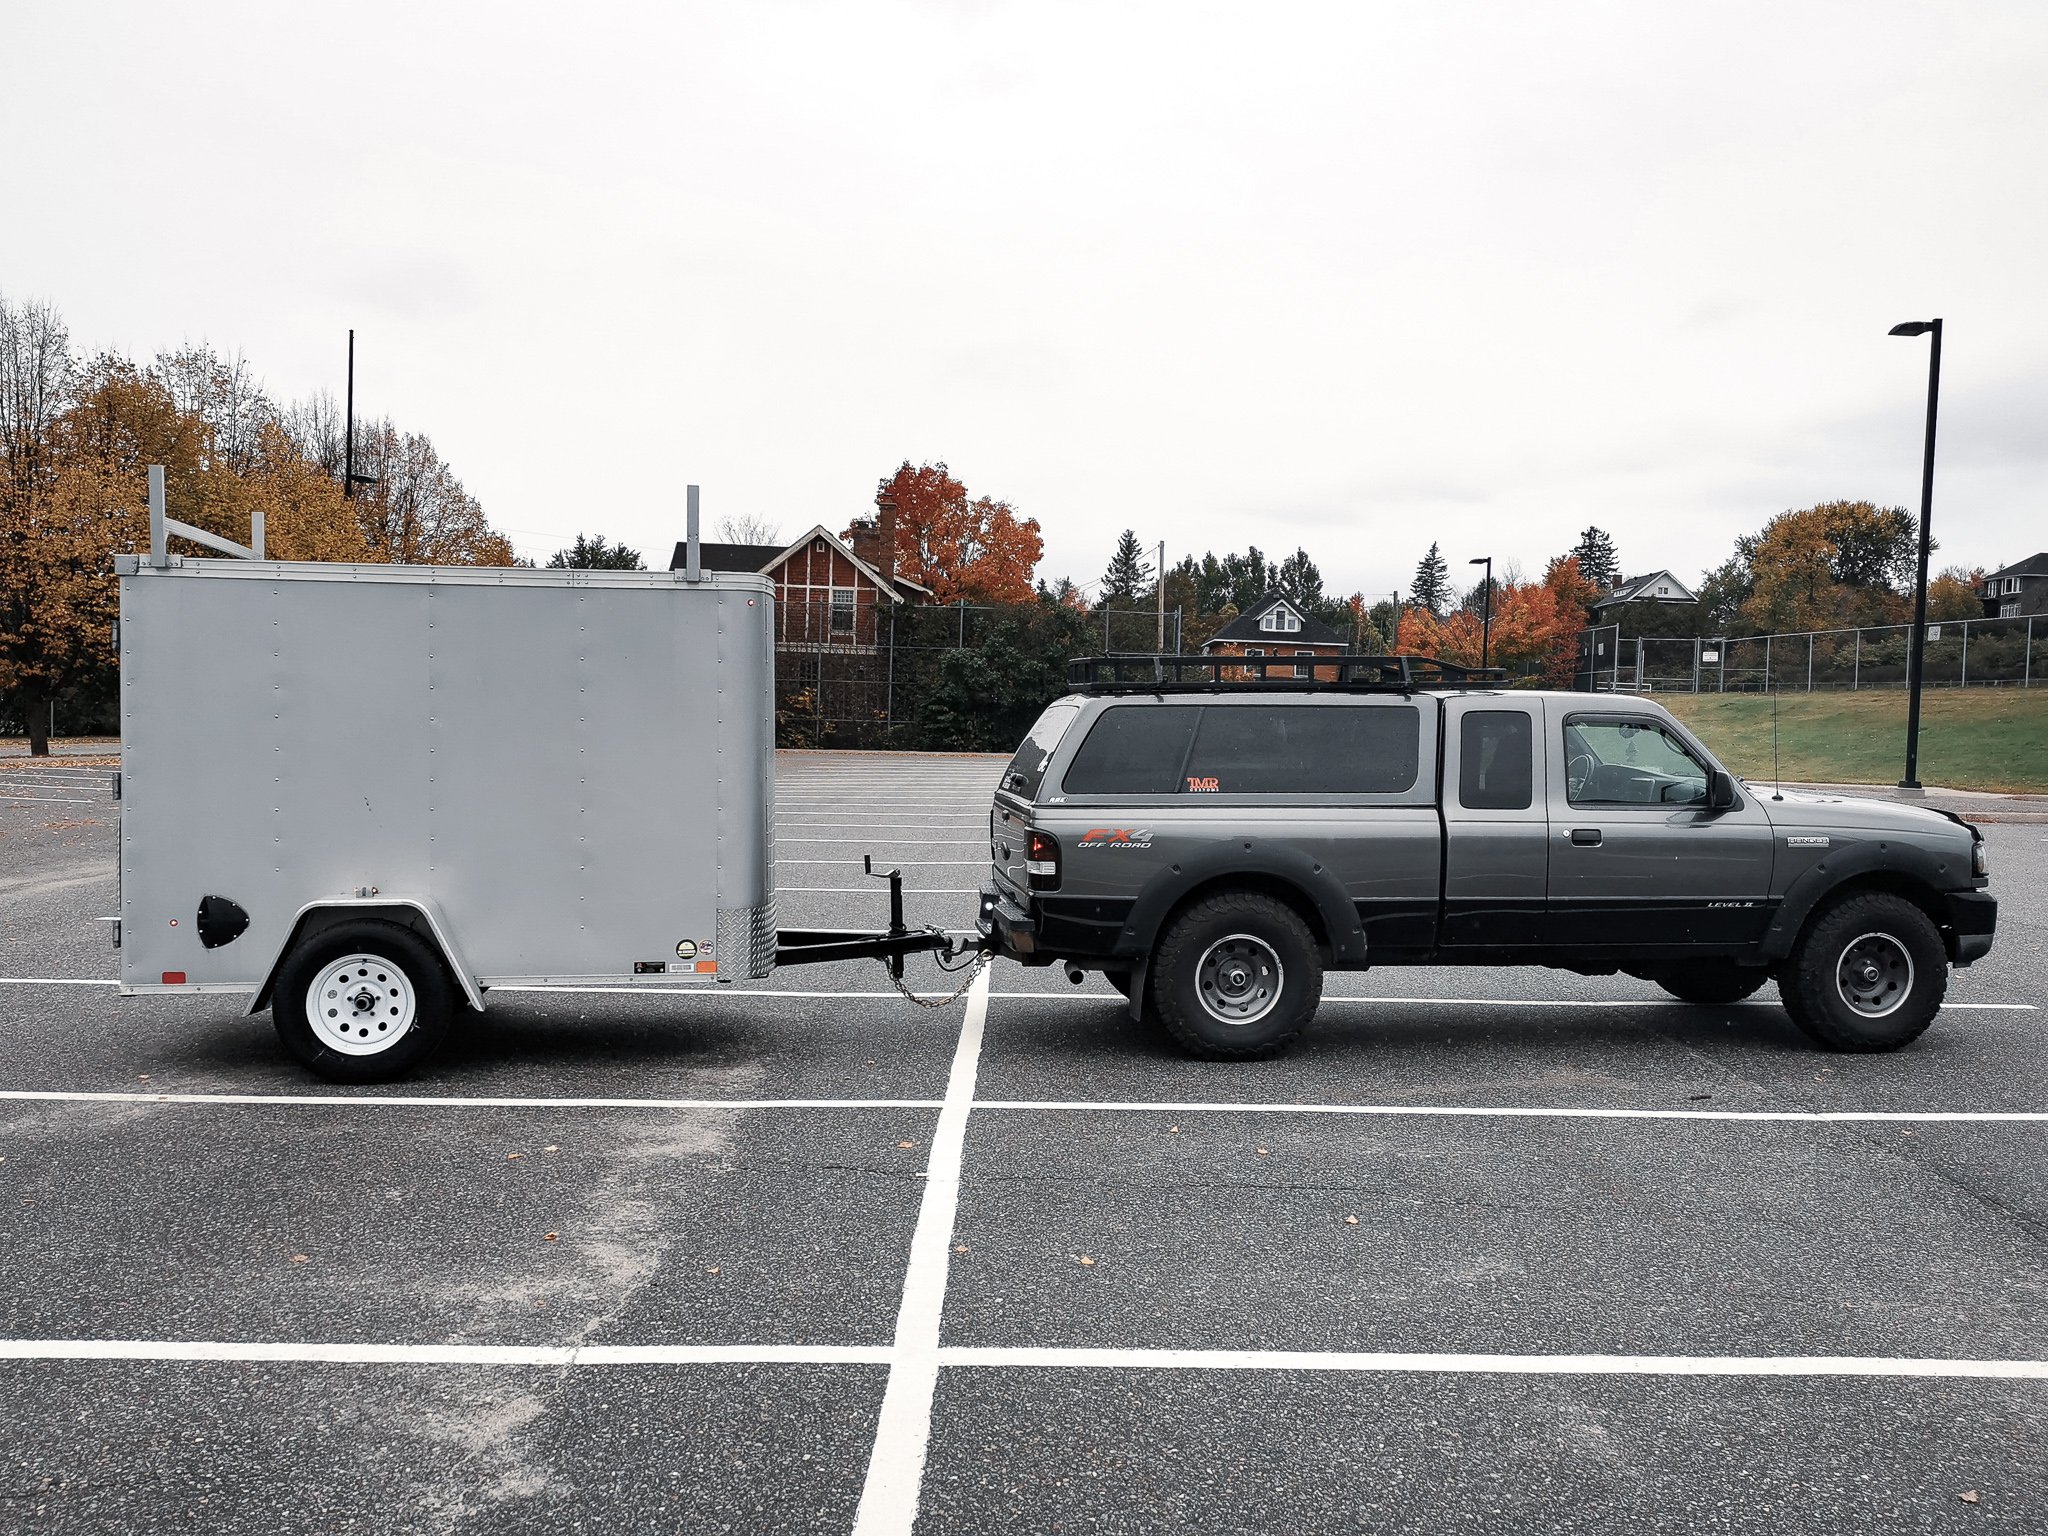
18 - WHEELS & FENDERS
One of the first upgrades to the trailer was the installation of larger off-road wheels. The wheels were upgraded to increase ground clearance as well as match the tow vehicle for redundancy. This meant that custom fenders would have to be fabricated; ironically, these were one of the last things to be completed.
Acknowledging my lack of metal fabrication tools and skills, I reached out to a third party for the fenders. A man named Alain Parisien had an ad in the local classifieds for custom metal fabrication work. After a brief consultation, we came to an agreement that I would provide the design and he the material and labour. I had the privilege of being invited to his shop and participate in the fabrication process. Up until this point, the construction of the project had been a relatively lonely journey. It was motivating to work with another individual who is passionate about making. Unfortunately, during this time our community went into lockdown, and I was no longer able to participate in the fabrication process. Thankfully, I provided a clear design and detailed drawings for Alain to follow.
After a few months, I received the fenders which needed to be cleaned and painted. I prepped the surface with my angle grinder and painted the fenders with a black semi-gloss rust proof paint. After the paint was cured, I installed the fenders to the trailer with eleven ½” heavy duty bolts.
I can now legally tow my trailer on the road and use the fenders to mount gear and access the roof.

19
Working with my hands and having something to show for it at the end of the day is one of the greatest rewards that I have taken away from this journey. I have been physically engaged with the design, creating problems, and coming up with solutions for them. The Chuck Box represents not only a new way for me to occupy the landscape, but the ability to engage with likeminded groups of people.
I feel successful in my attempt to create an architecture that is suitable for my way of occupying the wilderness, a product that people understand and can relate to. I have built something real that I can use and test. I am eager to finally venture out with my trailer to partake in various exciting adventures.

CONCLUSION
I am currently sitting in the Chuck Box near a lake, about 20 kilometers south of Temagami, Ontario. I am spending the last hour of my evening writing this conclusion. This is the first overnight camping trip with the trailer, as well as the first overnight outing for my wife, our dog, and I after a seemingly unrelenting winter. There is still some snow on the ground, and the weather is in that temperamental state where dressing in layers is key. The weather network is calling for freezing rain overnight; thankfully, we have a warm and secure shelter where we can lay our heads.
Earlier today, as I was completing one of my favorite tasks, foraging firewood, I was reminded of the values of being outdoors. The energy we expended while cutting and processing firewood would later provide comfort for the remainder of the evening. I was present, aware, awake, and for a brief moment, free from the momentum of life that tends to keep one occupied on a daily basis. After the bulk of the processing was done, we cooked dinner over the fire and watched the sun set while sharing a bottle of wine.
Although this is a short trip, this is a moment that I will remember for the rest of my life. I feel pride in my ability to unite my architectural knowledge with the landscape I care about. I am excited and looking forward to whatever adventures lay ahead.
POST-OCCUPANCY REFLECTION
BELOW IS A LIST OF THINGS I WOULD LIKE TO IMPROVE ON THE CHUCK BOX
Being critical of the construction quality of my work, it is difficult for me to look away from the little imperfections and deficiencies.
The wall transition to the ceiling could have been better. Currently, there are cuts from installing the wall where a gap can be seen. I will have to install trim to hide these gaps. I should have allowed equal spacing for the cedar planks on the ceiling along both sides so that the layout would be centered within the space. My craftmanship of the millwork would have been more precise if I had access to a table saw. I will have to find flexible trim to finish around the window. I question the durability of the folding legs that I built for the bed. I will likely replace them with something sturdier and hardware that locks in place when opened. The 3” memory foam mattress lacks support; the solid bed frame below can be felt after sitting or lying for a long period of time. A denser material would improve this, but for now I will rely on additional blankets. A portion of the walls had to be removed in order to bolt the fenders on. If the fenders had been completed before the walls were finished, this could have been avoided. The crank for the bottle jack on the tongue of the trailer hits the storage box if you do not spin it a certain way. This jack should be replaced with a pivoting one to increase ground clearance. I would like to lengthen the tongue of the trailer to improve handling and articulation.
My design was tight. The dimensions on paper were exact and this made it difficult to coordinate the tolerances of the construction. I have learned to balance these dimensional nuances with my design aspirations. I believe this process has made me a better designer.


ADVENTURES
OFF-ROAD, ON-ICE, OFF-GRID, CAMPING, ICE FISHING & HUNTING


